The default security will allow all users to enter their own orders, choose a sales goal, and see their Personal URL for selling on-line.
To create and manage a fundraising drive, you must be authorized for the Fundraising user role.
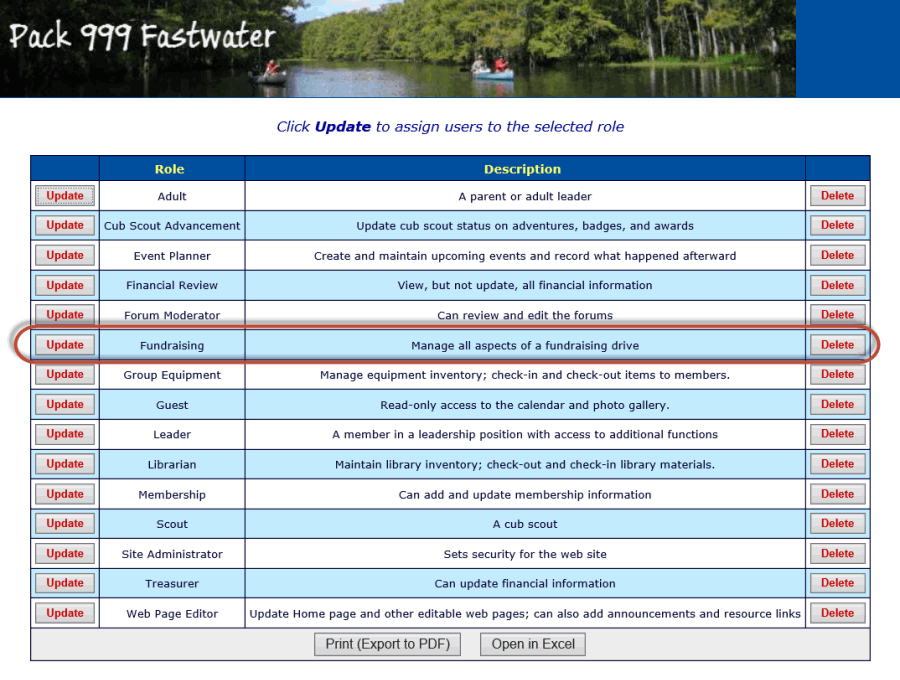
Select User Roles from the Administration menu to assign this role to specific users.

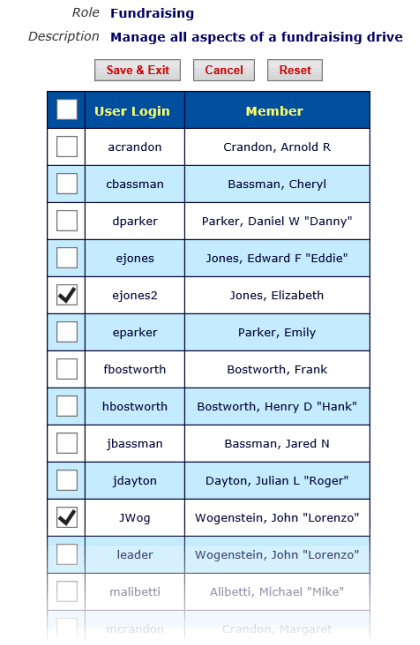
Click the Update button to give users the Fundraising role.

Click on the checkbox next to each user to whom you wish to give this role.
Then click the Save & Exit button to save these changes.
If you want to give users some, but not all, of the fundraising management capabilities, you can customize your user roles or create new user roles that incorporate any of the following tasks:
|
Task
|
Capabilities
|
|
Enter Fundraiser Sales From Booth
|
Use the Booth Sales page to record sales at a booth and accept payments via cash, check, credit card or debit card.
|
|
Maintain Fundraiser Orders
|
Enter and review order orders sold by any member of the troop.
|
|
Enter Payments For Fundraiser Sales
|
Enter monetary transactions for payments that were received for orders.
|
|
Maintain Fundraiser Inventory
|
Enter inventory transactions to track quantities of each item that are on order or are on hand.
|
|
Maintain Fundraiser Inventory Transaction Types
|
Customize the inventory transaction types.
|
|
View Fundraiser Reports
|
View and print any of the fundraiser reports.
|
|
Enter My Fundraiser Orders
|
Enter your own orders on-line, choose a sales goal, and see your Personal URL for selling on-line. This is enabled for all users by default.
To disable this capability, remove it from the user roles.
|
|
Maintain Fundraising Drives
|
Manage every aspect of fundraising drives. This is the task linked to the Fundraising user role.
You can add it to other roles to give them full control of fundraising.
|
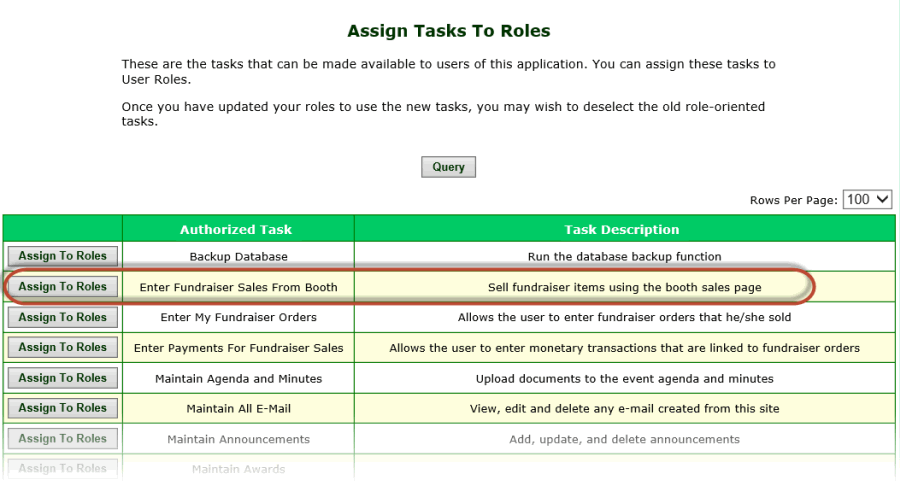
For example, to authorize some of your leaders to use the Booth Sales page, select Assign Tasks To Roles from the Security Configuration submenu on the Site Configuration menu.
Find the Enter Fundraiser Sales From Booth task, as shown below:

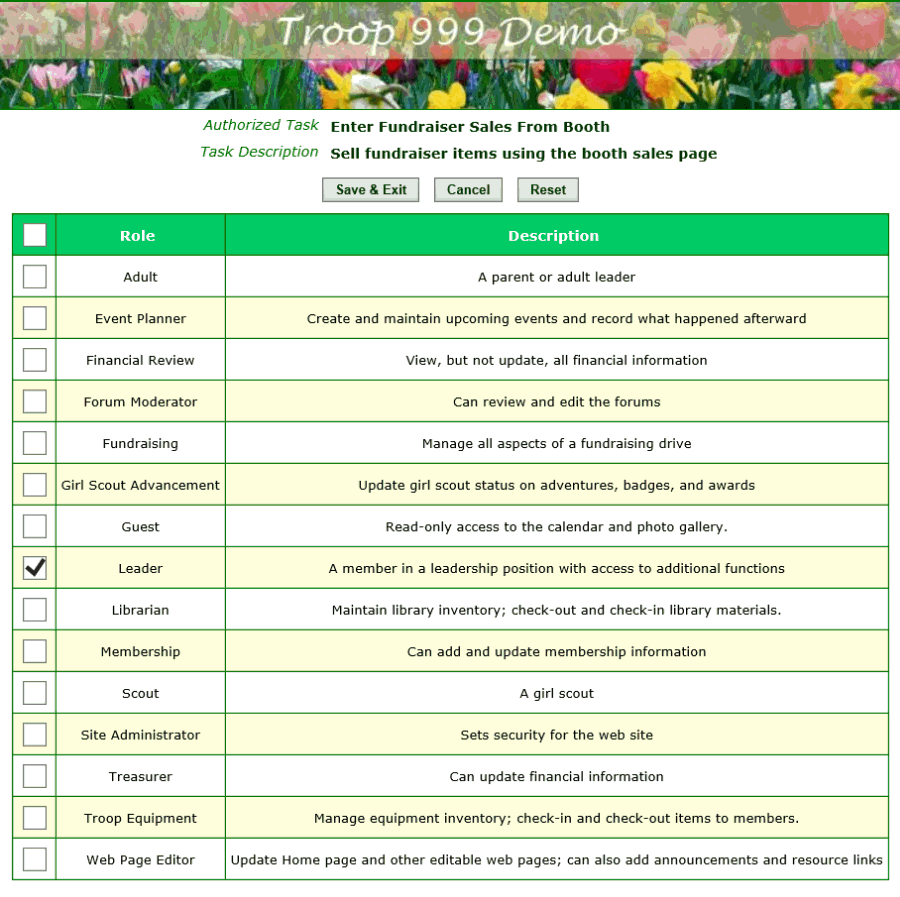
Click the Assign To Roles button to view a list of your user roles.

Click on the checkbox next to the user roles you wish to authorize to do booth sales. Then click Save & Exit to save your work.
Alternatively, you can create a new user role that is authorized for one or more of these tasks. To do this:
- First, create the new user role by selecting Configure User Roles from the Security Configuration submenu on the Administration menu.
Click Add A New Item to begin adding your new user role.
- Then assign this new user role to individual users from the User Roles page on the Administration menu, as described at the top of this page.